Showing posts with label pumpkin. Show all posts

Friday, October 11, 2013

Inspired Gratitude Card


I love this card. :) I know I was inspired by something I saw on Pinterest, but I didn't pin it. Odd, because I like to know where to attribute the inspiration. Oh, well. :)

This is another project we did for the Hostess Club get-together. It was such a great day! :) That's the Framed Tulip around the outside; the Antique Wallpaper one is retired now, but you can use any texture folder you wish!

OK, I'm outta here. If you have any questions, don't hesitate to ask me! And you can start your own hostess club any time you wish. :D Just let me know.

Have a wonderful weekend! Take the time to stamp something!

Wednesday, November 24, 2010

A Thanksgiving Gift for YOU! :)

Happy Thanksgiving Eve! :D As my way of letting you know how much I appreciate you, I put together this tutorial for a Top Note Pumpkin; I taught this a couple of years ago at a Thanksgiving Stamp Camp, but have had a request - and got it cleared as OK to share with my most loyal class attendee (THANK YOU, Mary!! :) ) - for this tutorial. So, here it is, for all of you to have fun with. :) There are LOTS of photos - and don't forget, you can click on any of them to see them the size I uploaded them. :)

You will need:
--Big Shot and your acrylic cutting pads and platform (came with it, if you got your Big Shot from Stampin' Up! :D)
--6 pieces of Pumpkin Pie card stock, cut to 5-1/2"x4-1/4"
--Pumpkin Pie ink pad (doesn't matter what size!)
--sponge
--2-way glue pen
--glue stick
--bone folder
--Sweetest Stems embosslit
--Top Note die
--large oval punch
--scraps big enough for project of Chocolate Chip and Garden Green


First, cut all six pieces into Top Note die cuts. I did three at a time!


(Pause, and admire your work so far. :D )


Now, start folding; you're folding them in half the short way. (I think you know what I mean!)


Do all six!


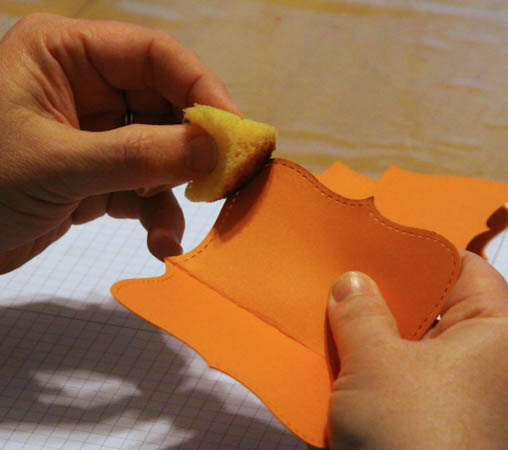
Now, take your ink and sponge, and start sponging all around the edges of a Top Note die cut.


Go all the way around. You don't want to just EDGE it, but sponge into the card stock.


Yes, do all six! If you aren't careful - which you don't need to be! :D - it won't take you too long at all. :D


Don't forget to close your ink pad up! :D


Now, take the glue stick and glue one half of a Top Note die cut.


Put glue stick on the matching half of another Top Note die cut.


Clean up any glue stick that might come out around the edges. :D


Glue three of the die cuts together. Then glue the other three together.


See? Like this!


Now, put the Garden Green card stock into the embosslit and run it through.


Take it out and separate it from the rest of the card stock - that's trash, now.


Punch out the large oval from the Chocolate Chip card stock.


Now, use the punch to take "bites" out of the oval; they should be different bites, not symmetrical.


Now, put glue stick on one half of the Top Note die cuts, and position the embosslit die cut first.


Now, put the stem on. Doesn't need to be straight or anything. :D But you can see that the stem is not all the way on the die cuts. That's the way to do it!


Now, put glue stick on the matching half of the other stack of Top Notes.


Put away your glue stick! :) Get out that 2-way glue pen, and put plenty of glue on one side of the total pumpkin stack. And walk away. :D


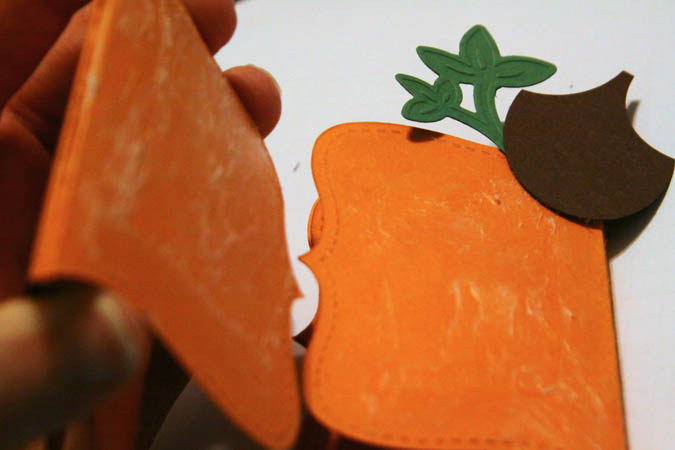
Do NOT stick the rounds of the pumpkin together until that 2-way glue is COMPLETELY dry. It's now re positionable, and you can unfold to store from year to year! (I'd put a piece of waxed paper on top of the glue....)


Play with the shape until you're happy with it! :D


I'd LOVE to hear what you think - and what you use your pumpkins for! :) Have a WONDERFUL Thanksgiving!

Wednesday, August 11, 2010

Inspiration struck!

Monday evening, while we were making embellishments, I was trimming down the card stock scraps after we'd punched them - and saw something in the negative space that made me want to play. SO, here's the result!


Isn't it fun?!? :D The pumpkin is a Sizzlit, the back is the small scallp punch (I used it because I already had it punched out!); the hat is from the Halloween Build-a-Bear die, and the face is the OWL punch! I punched out the horns and part of the head, and curved it around to make the mouth; I used just the big and tiny eye pieces. I think it's ADORABLE; my mom wants me to make some to stick in a gourd for Halloween. :D

Let inspiration strike YOU, too! Or leave me a note - I'm lonely, and I'd like to look at my email while I'm on the road this week and see what you have to say! :D

Have a WONDERFUL day! Take the time to STAMP something!

Tuesday, October 21, 2008

The Inspiration Station!


Hi, everyone! Here's the fresh, new look of the Inspiration Station!


For the rest of the week, I'll be sharing at least one of the new projects here! :)


First, there was a question on one of the comments from last week that I want to answer. :)


Hi Lori,This is my first time visiting your blog. What did you use to clean off the ornaments before you adhered the rub-ons?Stampin' Smiles from Ear to Ear, Ann :)


Ann, I used rubbing alcohol or an alcohol pad. It's the simplest, easiest way to do it. The alcohol pads are really convenient; you can find them with the diabetic supplies at most superstores. :)


OK. On to a new project!


Both of these ideas came from fellow demonstrators; I can't wait to show you some winter/Christmas takes on these! :D
The pumpkin is made with the large circle punch and the five-petal flower punch. It's SUPER-cute!!!
The Frankenstein face you've seen here before; this one is smaller, and it contains a standard-sized Hershey's chocolate bar.
The thing that makes him really incredible is the sponging on his nose and eyelids, and the white reflections in his eyes. He's FUN, isn't he???
Stay tuned for more show-n-tell! :) Have a wonderful day - and PLEASE, take the time to stamp something!!

Tuesday, August 26, 2008

I just HAD to share!!!


Most of you know that Stampin' Up!® has partnered with Sizzix to offer the Big Shot and exclusive dies; they'll be available for you to purchase starting September 2.
Well, I got MINE today, and have just been playing. :D I don't want to show you a LOT, but I did want to show you this card - the only thing STAMPED is the greeting. I used a LOT of ink! The maple leaf is all ink, and I used the reverse mask from cutting the leaf out from some card stock; I just filled in the cutout area with a stipple brush and Ruby Red classic ink. The card base is Sahara Sand - just because I already had it cut. :D
The pumpkin is a die that I cut, and colored the stem with Creamy Caramel, and I lowlighted (Is that a word?!?!) the main part of it with Pumpkin Pie.
The "Happy Thanksgiving" is from HOLIDAYS & WISHES, and I stamped it with Chocolate Chip ink and punched it out with our new LARGE OVAL PUNCH. (Love my punches!!!) :) Edged the punch in Pumpkin Pie, and edged the card with it, too. The pumpkin is on one thickness of dimensionals, and the punch is on two.
It was a LOT of fun to do this card!!! :) I can't wait to continue showing you new things with my new toys! :D